Lightfielder | Install Python
These days, Python-based post-production pipelines are built using Python v3.
Python on Linux
The average RHEL/Rocky Linux 10.x system is typically running Python 3.12.x on a graphical workstation setup.
If you don't have a copy of Python 3 installed on a RHEL-based Linux distro, the dnf package manager can be used from a terminal session to install the Python package:
sudo dnf update -y
sudo dnf install python3 python3-pip -y
Note: On RHEL-based Linux distros, dnf replaces the earlier YUM package manager.
Note: If you are using an Ubuntu-based Linux distro, you need to use the APT package manager to install Python.
Note: Python version 3.12 is a good choice in the year 2026 for a Linux system that is running without a virtual environment like Conda / Miniconda. If you have a virtual environment and use it to launch a Resolve session, then you are able to more easily use a wider variety of compatible Python versions on the host computer.
Python on macOS
Python 3 for macOS is no longer bundled with macOS by default. This means it requires users to download and run a Python 3 installer which is available from the Official Python website.
Python 3.11.9 for macOS Download Page
https://www.python.org/downloads/release/python-3119/
Python 3.11.9 macOS 64 Bit Universal Installer Direct Download
https://www.python.org/ftp/python/3.11.9/python-3.11.9-macos11.pkg
After you download the Python for macOS .pkg installer file it's a pretty quick process to go through the installation and configuration steps.
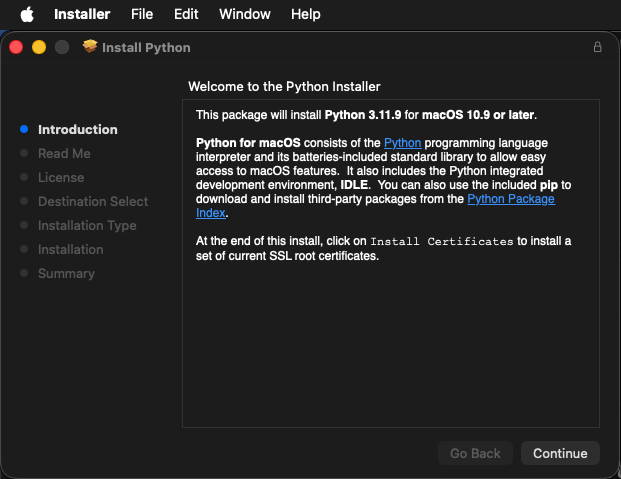
The installer will place the supporting Python utilities on disk at:
/Applications/Python 3.11/
Testing the Python3 Executable
Using the terminal utility you can verify Python v3.11 was installed by typing in:
python3
Note: On some systems the python3 executable will simply be called "python" when there is no Python2 installation present:
python
An interactive Python session will be launched. To quit the python program in the terminal type in:
exit()

In Resolve you can check if Python 3 was detected by going to the "Workspaces > Console" menu item.
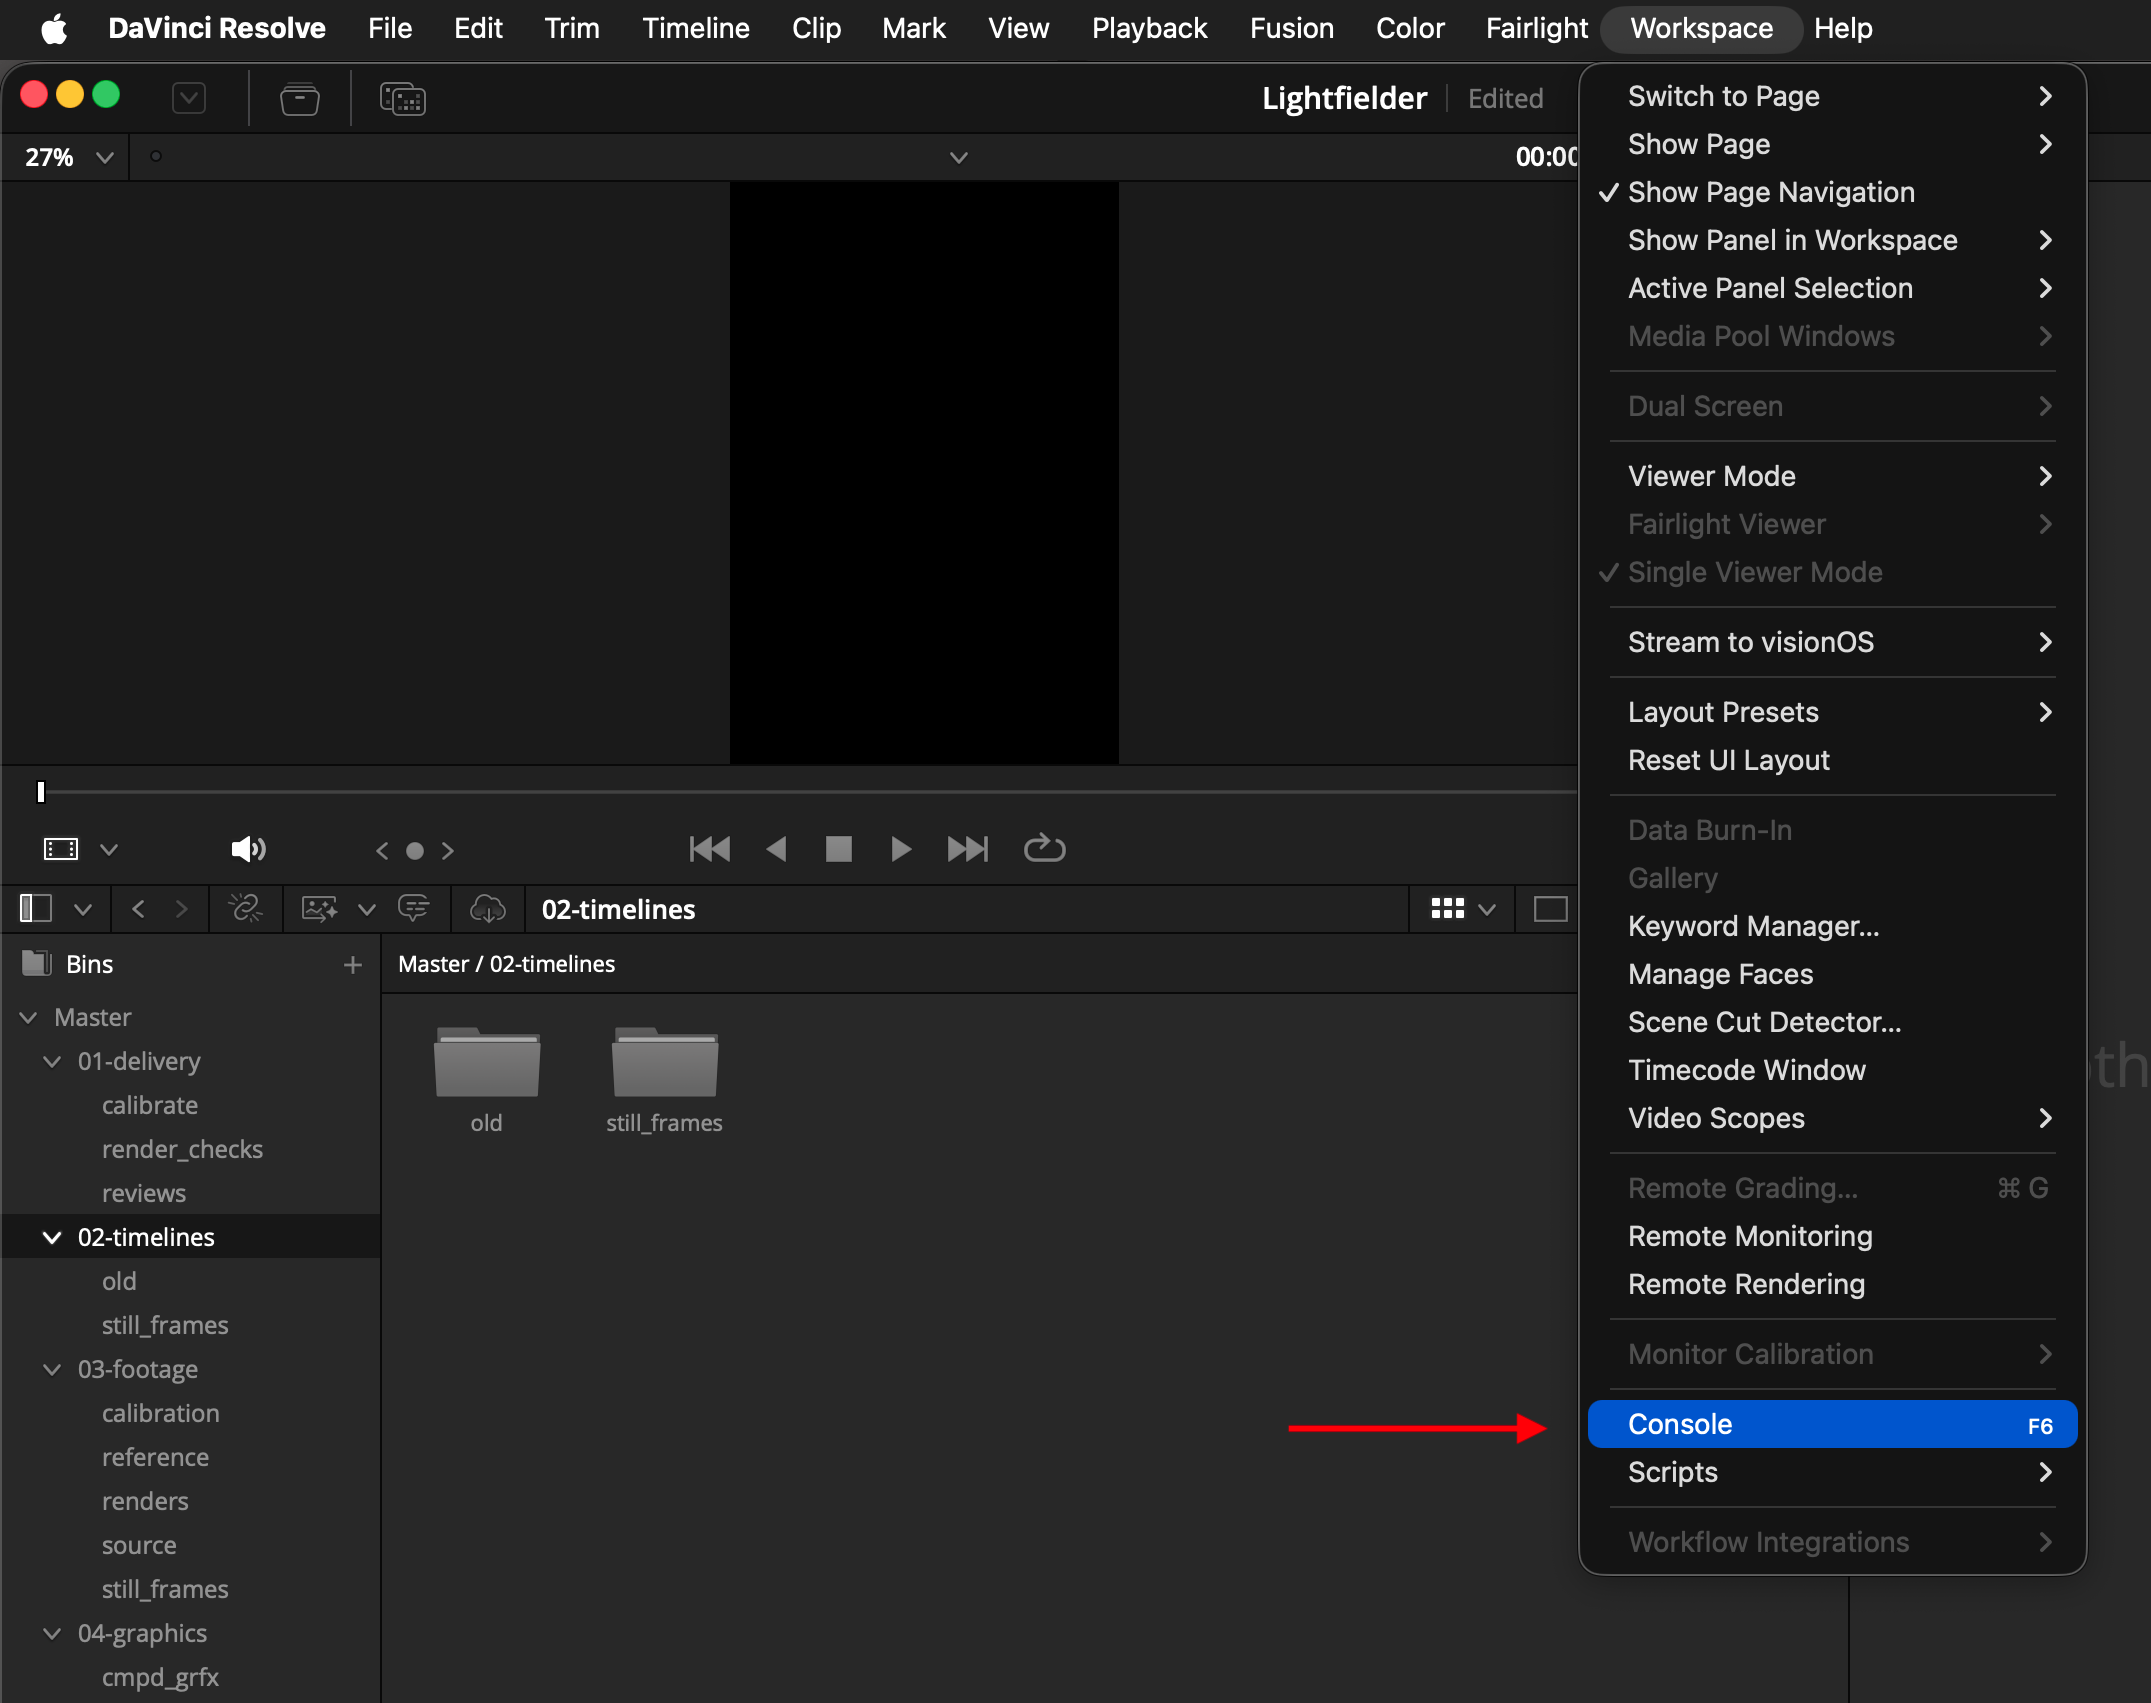
Click on the button labelled "Py3" at the top of the Console window. This will enable Python as the scripting engine when the text input is input in the Console window.
Note: If an active installation of Python 3 is not found on the computer, a dialog message will appear letting you know how to solve the issue.
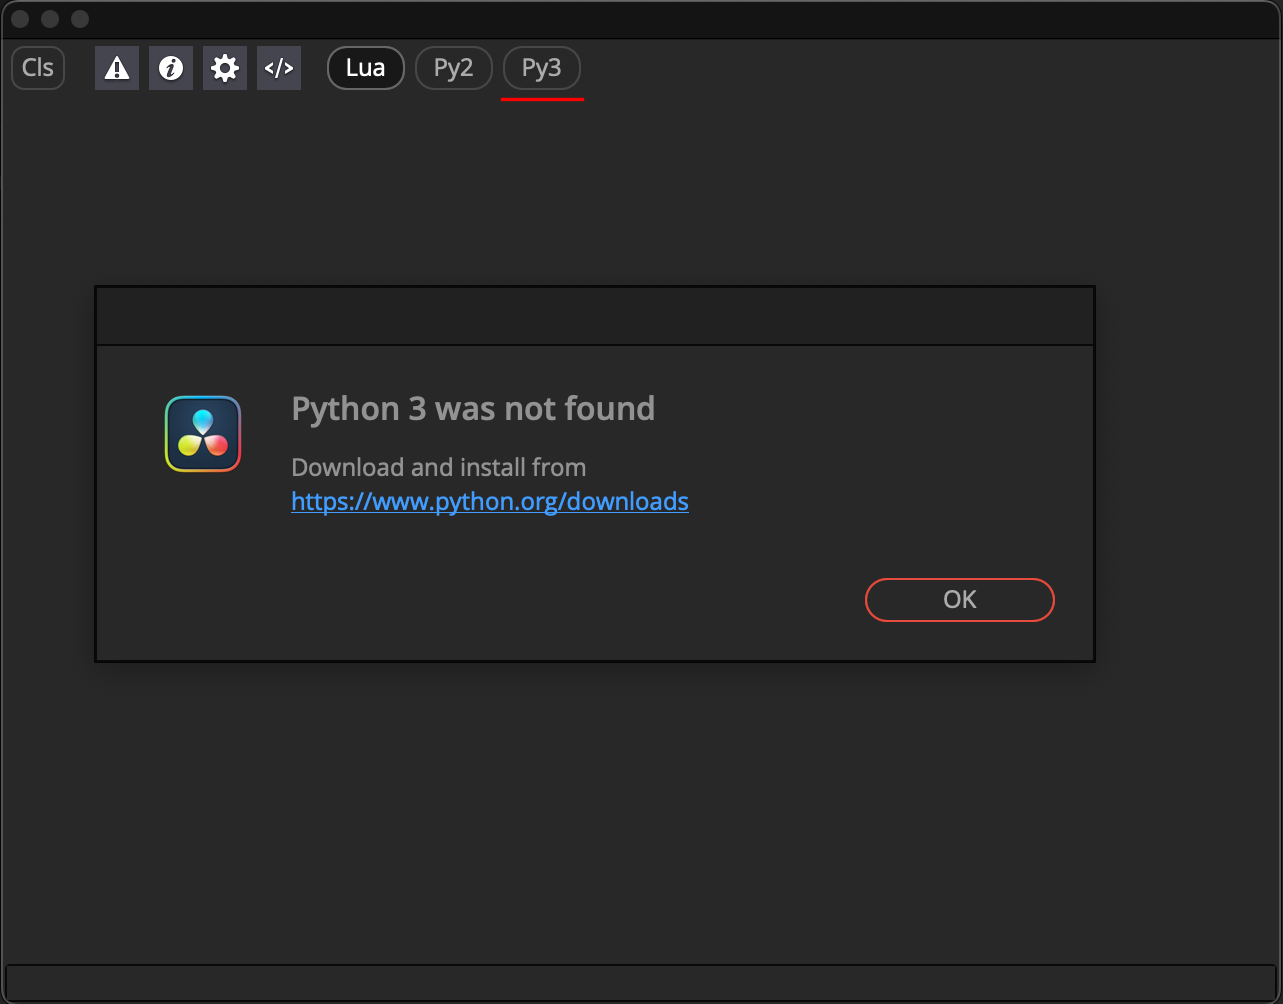
If an active installation of Python 3 is available then you can continue. There is a single line text entry field at the bottom of the Console window. Paste in the following Python code and press enter to run it:
import sys;print(sys.version);print(sys.prefix)
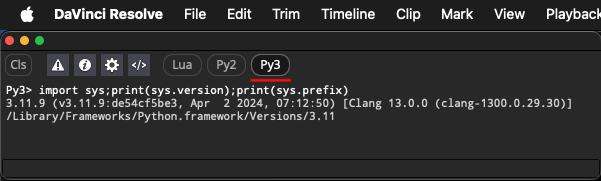
The Console window should display the following output:
Py3\> import sys;print(sys.version);print(sys.prefix)
3.11.9 (v3.11.9:de54cf5be3, Apr  2 2024, 07:12:50) [Clang 13.0.0 (clang-1300.0.29.30)]
/Library/Frameworks/Python.framework/Versions/3.11
The second line of text that is output to the Console window lists the Python version information.
The third line of text shows where Python is installed on your hard disk. This is useful information for tracking down problems like having two copies of Python 3 installed at the same time, and you don't know the location of the exact Python version that Resolve is using right now.
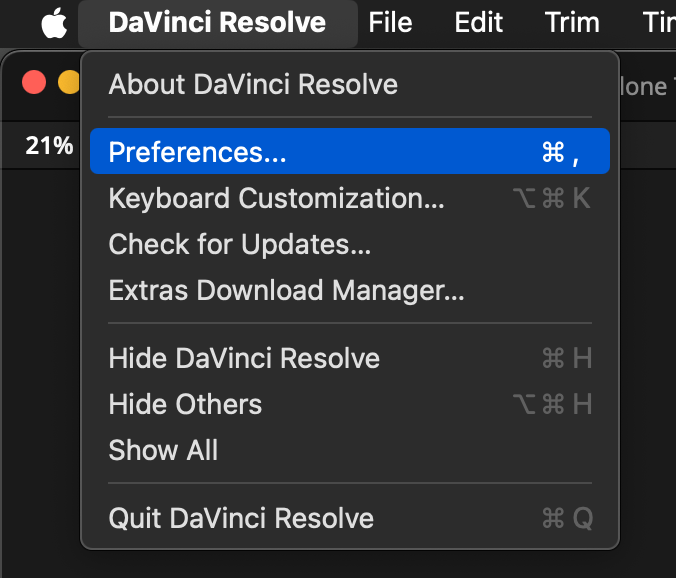
To enable external command-line scripting support in Resolve Studio, go to the "DaVinci Resolve > Preferences…" menu.
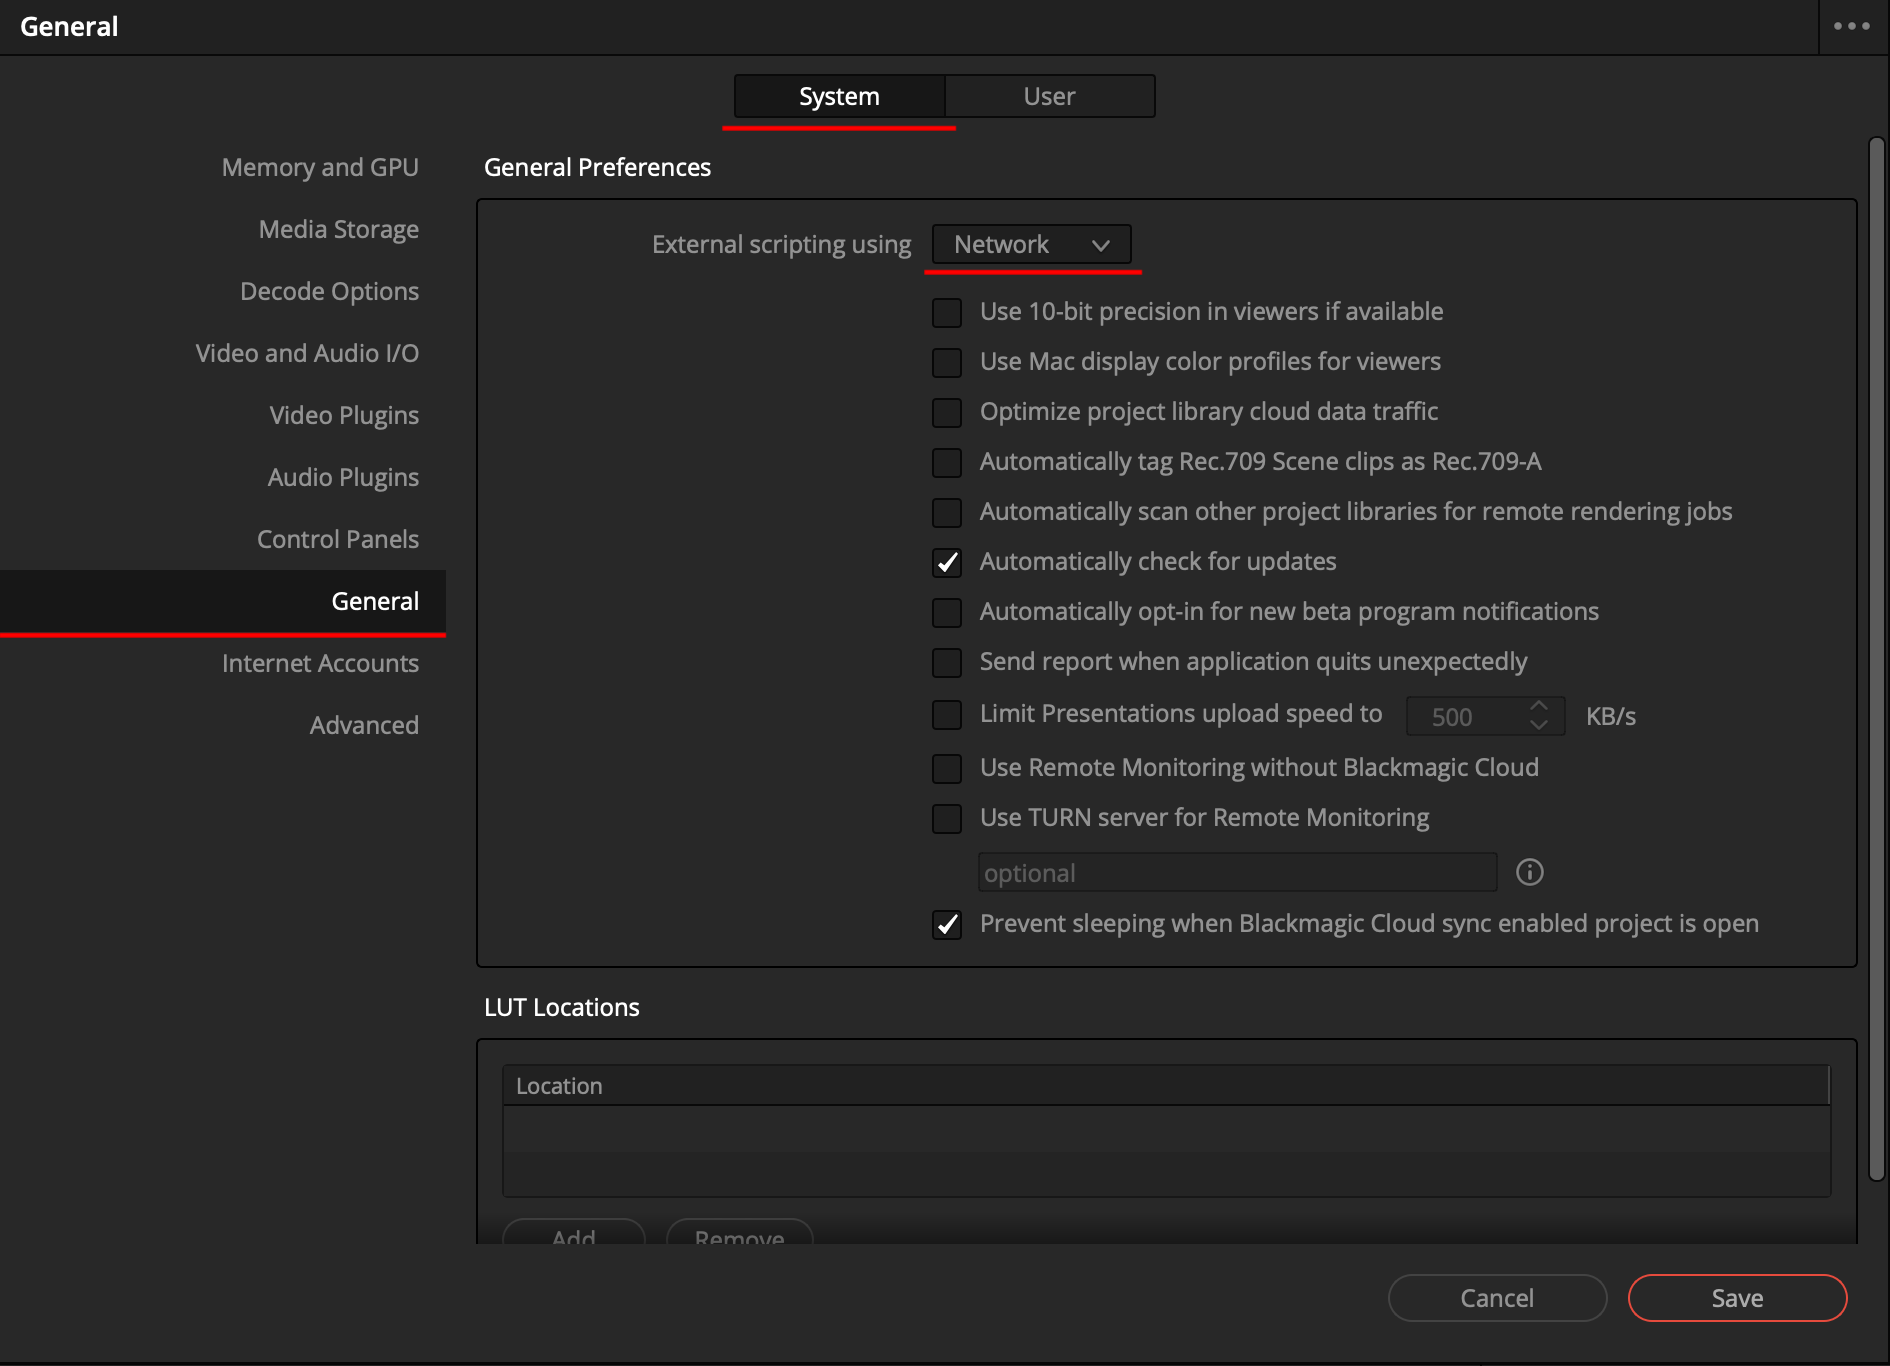
In the preferences dialog, switch to the "System" tab at the top of the window. Then select the "General" setting section on the left side of the window. Look at the General Preferences section and change the "External scripting using" entry to "Network".
Pip Package Manager
Pip is the package manager for Python. Check out the PyPi website for details on the common Python packages you can use.
You can update your current pip version using:
pip3 install --upgrade pip
If you are running Windows you can update your current pip version using:
python3 -m pip install --upgrade pip
If your python executable is called simply "python" instead of "python3", you can update your current pip version using:
python -m pip install --upgrade pip
Requirements
If you open the Terminal and change the directory to the Lightfielder-DaVinci-Resolve folder you can run the following command to add the required Python modules in a single step:
macOS and Linux:
cd $HOME/Lightfielder/Extras/
pip3 install -r requirements.txt
Windows:
cd %USERPROFILE%/Lightfielder/Extras/
pip3 install -r requirements.txt
OpenTimelineIO Install
OpenTimelineIO (OTIO) is an editing timeline interchange library for Python. Resolve v18.5 added support for importing and exporting OTIO formatted timelines.
The macOS & Linux Terminal based install commands for OpenTimelineIO are:
python3 -m pip install --upgrade pip
pip3 install OpenImageIO
pip3 install OpenTimelineIO
pip3 install usd-core
pip3 install PySide6
If the OTIO library functions as expected, you can start a Python3 interactive scripting session in the terminal by typing in:
python3
To validate the install process was successful, you can copy/paste the following block of text into a new Python3 interactive session in your terminal window:
import opentimelineio as otio
print(otio)
exit()
If OpenTimelineIO works correctly the terminal window will reply with output text that looks like this:

The result should be:
<module 'opentimelineio' from '/Library/Frameworks/Python.framework/Versions/3.11/lib/python3.11/site-packages/opentimelineio/__init__.py'>
OpenTimelineIO Error handling
If you try to run a Lightfielder script that operates on timelines, without having OpenTimelineIO installed, you will see an error message. The steps shown in the error dialog will help you fix the missing Python module issue.
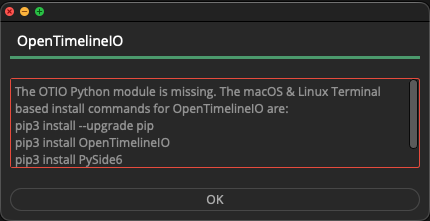
The error dialog message content is:
The OTIO Python module is missing. The macOS & Linux Terminal based install commands for OpenTimelineIO are:
pip3 install --upgrade pip
pip3 install OpenImageIO
pip3 install OpenTimelineIO
pip3 install usd-core
pip3 install PySide6
Python Virtual Environments
If you want to use a Python based virtual environment, the two most popular starting points are to use Anaconda Python's Conda virtual environment, or to use the native Python package named "virtualenv":
pip3 install virtualenv
On some systems the pip3 executable will simply be called "pip" in the terminal window. (This is typically the case if there is no pre-existing Python2 installation present.)
pip install virtualenv
Jupyter Notebook Install
Jupyter Notebook is a popular Python based IDE (integrated Development Environment). It is used extensively in the CV (Computer Vision) and ML (Machine Learning) sectors.
Note: Using Jupyter Notebook with Lightfielder is an optional step. Jupyter is used for lens calibration workflows to create the lens distortion correction K1-K3 values.
You can install Jupyter Notebook on macOS from the terminal using:
pip3 install --upgrade pip
pip3 install jupyter ipykernel
You can list the Python version used by the Jupyter software's script interpreter "kernel" using the following terminal command:
jupyter kernelspec list
The terminal will show a result like:
Available kernels:
  python3    /Library/Frameworks/Python.framework/Versions/3.11/share/jupyter/kernels/python3
After installing the Jupyter Notebook program, you are able to manually start the local Jupyter server instance by hand.
This software is controlled using a web-browser (Chrome, Safari, Firefox). The starting of a new Jupyter software session is done from the terminal window with one of the following commands:
jupyter-notebook --browser=Safari
jupyter-notebook --browser=Chrome
jupyter-notebook --browser=Firefox
Removing Python Modules
It's possible to remove the "OpenTimelineIO" and "PySide" Python modules from your workstation. These items were added during the initial installation of Lightfielder.
The macOS & Linux Terminal based Python package uninstall commands for OpenTimelineIO are:
python3 -m pip install --upgrade pip
pip3 uninstall OpenImageIO -y
pip3 uninstall OpenTimelineIO -y
pip3 uninstall usd-core -y
pip3 uninstall PySide6 -y